2 Min Read
When a family grows, the immediate instinct is often to add square footage. But sometimes, the secret to a better home isn’t expanding outward—it’s optimizing inward.
For this project, our clients didn’t need a massive addition. They simply needed their existing footprint to work harder, smarter, and better for their two young kids.
What Sparked the Remodel
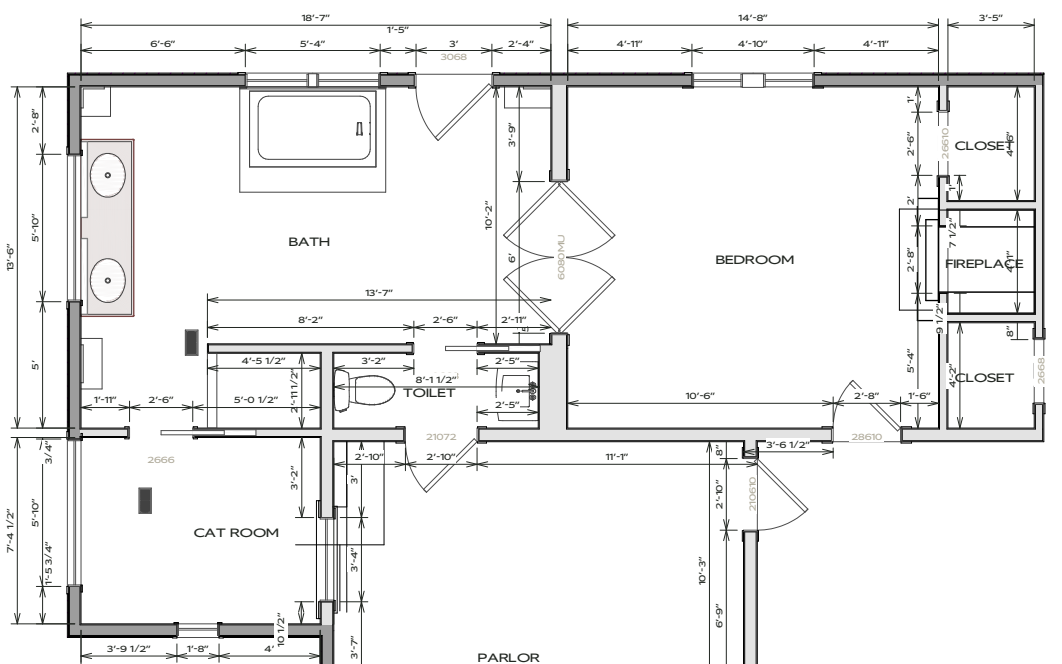
Design Insight: Take a look at the BEFORE (first layout) and AFTER (second layout) construction plans below. On the top is the original "as-built" floor plan; on the bottom is the new layout. Notice those old French doors on the original plan? We replaced that awkward transition with a clever architectural feature: a custom, double-sided bookshelf that serves as both a structural wall divider and built-in storage for both bedrooms.
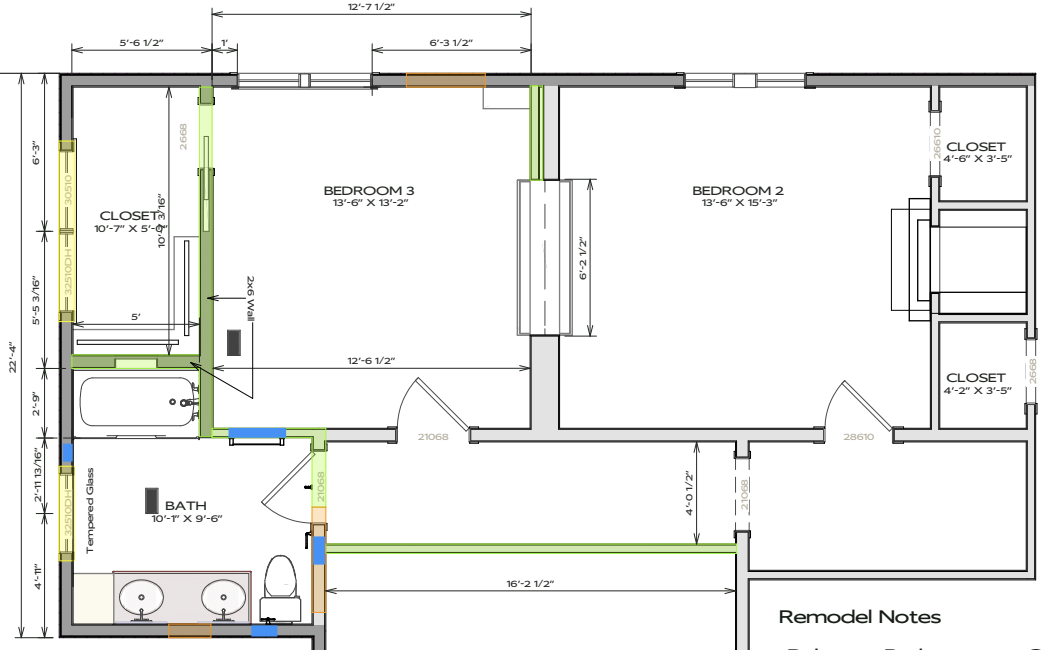
Challenges in the Original Layout
Every great remodel starts by solving a pain point. For this home, we were tackling two major design flaws:
-
The Bedroom Deficit: One bedroom and a massive, poorly utilized bathroom meant the kids didn't have functional spaces. They needed dedicated areas to grow into, along with a bathroom tailored to their routines.
-
The Privacy Problem: In the original layout, stepping into the front parlor/entryway meant looking straight into the kids' main living area. By closing off this access point, we insulated the new kids' wing from the busiest parts of the house.
-
The Bonus Win: Closing that doorway also freed up valuable wall space in the front parlor, making the entryway significantly more functional and easier to furnish.
Design Changes That Made the Biggest Impact
The best design-build projects don't just modernize a home—they honor its history. Because this property boasts incredible character, we were hyper-intentional about ensuring our updates didn't stick out like a sore thumb.
-
Preserving the Character: We saved and restored the home’s original doors, hardware, and hardwood flooring wherever possible.
-
Intentional Trim Carpentry: New architectural details and trim profiles were meticulously matched to the existing historic craftsmanship so the transition from old to new is seamless.
-
Invisible Exterior Updates: Reworking the interior footprint required shifting windows and removing an old exterior door. We repaired the exterior facade so you can't tell a remodel even took place.
Now, the home boasts a cohesive, historically respectful exterior, an optimized parlor, and a private kiddo suite that is ready to handle the beautiful chaos of family life for decades to come.
BEFORE PHOTOS
AFTER PHOTOS
PHOTOGRAPHY BY ROGUE SKY MEDIA
Want to Explore More PROJECTS OF OURS?
See how thoughtful remodeling elevates everyday living.
.png?width=300&height=300&name=Foundation%20Cost%20Guide%20Tablet%20Mockup%20(3).png)